Hello everyone!


Until now, I have explained you about projects using Arduino, and today I am going to explain you about a project which uses both Arduino and Python. In this project, I am going to be using Arduino and Python to control the VLC Media Player with just my hands. Read on further to learn how to do this project.


Hardware components used in this project
- Arduino Nano
- USB Type A to mini B cable (x2) - for Arduino Nano and breadboard power supply module
- Breadboard Power supply module - 3.3/ 5V
- Solderless Breadboard - Half+
- IR line tracking sensor module (x2)
- Male-to-Male Jumper wires - 10cm
- Female-to-Male Jumper wires (x6) - 20cm
Softwares used in this project
- Arduino IDE - Version 1.8.10
- Python 3.8
Hardware Setup


Your setup must look somewhat similar to those in the pictures above.
Schematic

IR line tracking sensor module
- (+) - 5V
- (-) - Ground (GND)
- S1 - D3
- S2 - D4
Coding
You will need to use both Python and Arduino IDE for this project. Before moving on to the coding of this project, let me guide you to install the Python software along with some important python modules.
Download the software from here. I would recommend you to download the latest compatible version for your OS. In this project, I will be using Python 3.8.1 as it is the latest version as of now.
Next, you will need to install the PyAutoGUI module and pyserial module to make this project work. Download these modules by following the hyperlinks below:
- PyAutoGUI module - Allows you to control the mouse and keyboard via the python scripts.
- pySerial module - Allows you to access the serial port
Installing PyAutoGUI and pySerial modules
Install the python software and open command prompt. Change the directory to the folder where you have installed the software. PIP is a packet management system that lets you install and manage software packages written in python. You will need to upgrade PIP before you install these modules. In order to do this, you will need to use the following function:
python - m pip install - upgrade pip
Install the PyAutoGUI module by typing the following function in your command prompt, after PIP is upgraded:
python - m pip install pyautogui
Repeat the process to install the Pyserial module after the installation of PyAutoGUI module is completed. You will be needing the following function for this:
python - m pip install pyserial
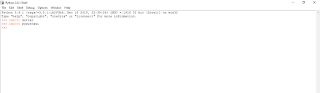
The next step is to check whether these modules are successfully installed. Open the Python IDLE and type 'import serial'. If the module was successfully installed, your Python shell will look something similar to this:

Arduino coding
We have successfully installed the Python software and the essential modules. Now, I will explain you about the coding done in Arduino.
- Play/ Pause - Place your hands in front of both IR sensors
- Increase Volume - Place your hand in front of the IR sensor which is on the right
- Decrease Volume - Place your hand in front of the IR sensor which is on the left
Create global variables for the sensors. You could name the variables as 'Right' and 'Left'. Within void setup( ), call pinMode( ) to configure the IR sensors' pins as INPUT. Set the data rate in 9600 baud (bits per second) for serial data transmission.
The IR line tracking sensor module will detect objects which are within 8mm from the IR sensor and sends a LOW signal to the Arduino microcontroller when it detects an object. Within void loop( ), program your Arduino Nano microcontroller to execute the functions explained above.
If both the sensors send a LOW signal, then the serial monitor must print 'Play/ Pause' and set a delay period of 500 milliseconds.
If the sensor on the right sends a LOW signal and the sensor on the left sends a HIGH signal, then the serial monitor must print 'Increase Volume' and you should add a delay period here as well.
If the sensor on the right sends a HIGH signal and the sensor on the left sends a LOW signal, then the serial monitor must print 'Decrease Volume' and set a delay period of 500 milliseconds.
Set a delay period of 300 milliseconds before completing the void loop( ) function.
Python coding
Now let's move on to the coding in Python. Open the Python IDLE and open a new file. Import the modules which we installed in the first step along with the time module. You will be needing the time module to use delay function. Create serial port object and open serial port. You can find pg.11 of this documentation useful for this process. Wait for 3 seconds while the communication establishes.
After the communication is established, read the serial data and print it. If the serial data received is 'Play/ Pause', then the typewrite function must be used to press the spacebar for 0.3 seconds.
You will be needing the PyAutoGUI module, so this website can be helpful in learning the functions of this module.
If the serial data received is 'Increase Volume', use the hotkey function. The arguments for this function in this case will be 'ctrl' and 'left'. Open VLC media player and press the 'ctrl' key and left arrow key to see the volume level increasing.
Repeat the same process for 'Volume down' but the arguments in this case must be 'ctrl' and 'right'.
Code snippet:

If anyone has questions with the coding, please feel free to comment below.
Final Look
If anyone has any questions, or suggestions, about this project, please feel free to comment below.
Ohh dats rllly good . A full tutorial . Idk abt python programming yet . But i feel like i need to learn it as soon as possible
ReplyDeleteHi its a nice develop but i am not sure how you conect Python y VLC media player
ReplyDeleteCan you give me more information?
ReplyDelete