Hello everyone!
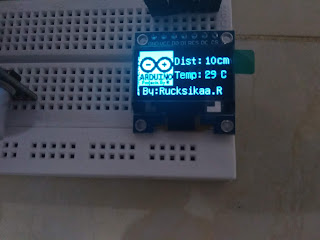
Today we will be learning how to make a distance meter using Arduino. For this project, we will be using an ultrasonic sensor (HC-SR04), temperature and humidity sensor (DHT11) and 0.96" OLED display module.
If you are not familiar with the OLED display module, please feel free to refer to my previous project:
Refer to this datasheet to learn about the ultrasonic sensor.
How does the distance meter work?
The ultrasonic sound sensor has an ultrasonic wave transmitter and receiver. A transmitter emits a signal which is reflected off an object - within 2 cm to 400 cm - and received by the receiver. The time taken for the signal to travel from the transmitter to the receiver is divided by two and multiplied by the speed of sound in air to give us the distance between the sensor and the object.
Distance (m) = (Duration/2 )/1000 x Speed of sound
The speed of sound in air is affected by the temperature of air, so the DHT11 is used in this project. The OLED display module displays the distance and the temperature of the air.
Supplies
- Arduino Uno/ Nano
- Solderless Breadboard
- Ultrasonic sound sensor (HC-SR04)
- 0.96" OLED display module
- Temperature and Humidity sensor - DHT11
- Male-to-male jumper wires (x24) - 10cm
- 3 pin female-to-female jumper wires (x4) - 70cm
- Type A/B cable (for Arduino Uno)
Setup
Your hardware setup must look somewhat similar to images above.
Connections
- DHT11 - D7
- (+) of DHT11 - 5V
- (-) of DHT11 - GND
- GND of ultrasonic sensor - GND
- Trig pin of ultrasonic sensor - D5
- Echo pin of ultrasonic sensor - D6
OLED Display Module
- GND - Ground
- VCC - 5V
- D0 - D10
- D1 - D9
- RES - D13
- DC - D11
- CS - D12
Coding
Please refer to my previous project to learn about the coding. You will also be needing the Adafruit sensor library(https://github.com/adafruit/Adafruit_Sensor) and the Adafruit DHT library (https://github.com/adafruit/DHT-sensor-library) for this project.
According to the datasheet (which I mentioned in the first section), there must be 10 microseconds delay between the HIGH and LOW signal from the trigger pin.
If you still need help with the codes of this project, please send a request to arduinoprojectsbyr@gmail.com and I will guide you.


Comments
Post a Comment